2026 Best Mini DC Motors How to Test Quality?

Time:2026-09-09 Author:Charlotte
0%

Choosing the 2026 best mini DC motors requires more than comparing speed, voltage, and price. A motor may spin smoothly on a clean workbench yet fail inside a compact medical device, toy, camera module, or automation assembly. Engineers should examine torque, current draw, startup behavior, vibration, noise, heat, and service life. These details reveal performance that a product sheet may not show.

This guide explains how to test mini DC motor quality using practical, repeatable checks. Apply the rated voltage with a regulated power supply. Measure no-load speed, starting current, running current, and surface temperature. Then add a controlled load and record speed loss. Listen for grinding sounds. Watch for unstable rotation. A small tachometer, multimeter, thermal camera, and torque fixture can provide useful evidence. Keep the test conditions consistent.

No test is perfect.

Real applications include dust, misalignment, changing voltage, and repeated starts. Therefore, one successful demonstration should not determine a purchasing decision. Test several samples from different production batches, and compare the results with the supplier’s specifications. Reliable manufacturers should provide traceable data, clear tolerances, and responsive technical support. However, even experienced testers can overlook connector resistance or mounting pressure. That mistake matters. Careful documentation helps expose these weaknesses before production. The following sections offer a practical framework for selecting, comparing, and verifying mini DC motors with greater confidence in 2026.
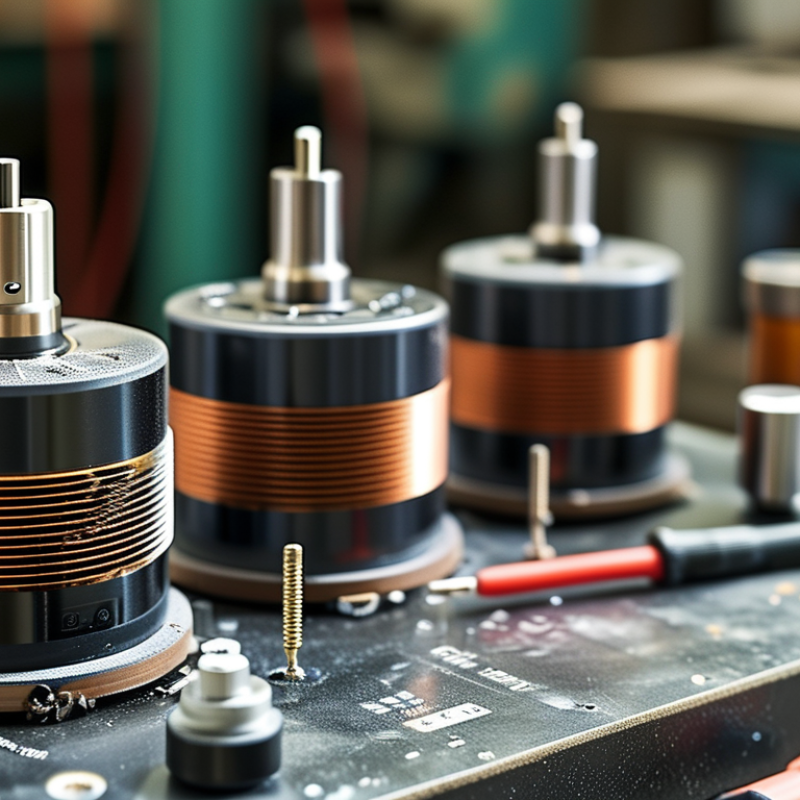
2026 Best Mini DC Motors How to Test Quality?

Mini DC Motor Basics and Key Quality Indicators

Mini DC motors convert electrical energy into compact mechanical motion. Their core parts include a rotor, magnets, brushes, commutator, bearings, and a metal housing. Each part affects performance. A motor may look identical to another unit, yet produce different noise, speed, or heat.

Quality testing should begin with rated voltage and a stable power supply. Measure no-load speed and current after the motor runs for several seconds. An unusually high current can indicate friction, poor brushes, or winding problems. Listen closely. Smooth rotation sounds steady, while clicking or harsh buzzing may reveal bearing damage. Small details matter.

Load testing gives stronger evidence. Attach a controlled load and record speed, current, torque, and temperature. Watch how quickly the motor recovers after a brief load change. Stall current should be measured carefully and only for a moment, because excessive heat can damage the winding. Check shaft runout with a dial indicator when precision matters. Inspect brush dust after repeated cycles.

In practical testing, I also compare several samples from the same shipment. One good motor proves little. A wider performance spread may suggest inconsistent materials or assembly. My own test records are not always perfect; room temperature, wiring resistance, and sensor accuracy can distort results. Repeating measurements helps, but it does not remove every uncertainty. A reliable mini DC motor should deliver stable output, controlled heat, low vibration, and predictable service life.

Tools and Preparation for Accurate Motor Testing

2026 Best Mini DC Motors: How to Test Quality?

Accurate motor testing begins with disciplined preparation, not a quick voltage check. Use a calibrated DC power supply with current limiting, a four-wire shunt, digital multimeter, tachometer, thermocouple, and adjustable brake or dynamometer. A rigid fixture keeps the shaft aligned. Small errors become obvious at miniature scale.

Record supply voltage, current, speed, torque, temperature, vibration, and sound. Test the motor without load first, then apply measured loads gradually. Allow temperature to stabilize before each reading. The International Energy Agency reported that motor systems consume about half of global electricity, while the U.S. Department of Energy found motor-driven equipment represents roughly 68% of industrial electricity use. These figures explain why efficiency testing matters, even for compact motors.

IEC 60034-2-1 provides useful guidance for determining motor losses and efficiency, although miniature motors may require adapted fixtures. Check the no-load current, startup response, speed drop, and temperature rise. Compare repeated measurements, not one impressive result. The first reading is not always trustworthy. I still repeat tests after changing cables or mounting pressure, because both can alter current and vibration. Keep a test sheet with instrument accuracy, ambient temperature, test duration, and load settings. Cheap equipment can work, but unverified instruments weaken the evidence. A slight shaft misalignment may look like poor motor quality. That mistake is easy to make.

2026 Best Mini DC Motors How to Test Quality? - Tools and Preparation for Accurate Motor Testing
Test Item Recommended Tool Preparation and Test Conditions Test Method Representative Result Typical Quality Criterion
Visual and Mechanical Inspection Magnifier, digital caliper, torque screwdriver Inspect the motor at room temperature, approximately 20–25 °C. Check the housing, terminals, shaft, mounting holes, and gear interface. Look for cracks, loose parts, damaged insulation, burrs, excessive shaft play, and uneven rotation. Measure critical external dimensions. Housing diameter: 24.9 mm
Motor length: 30.1 mm
Radial shaft play: 0.04 mm
No cracks or exposed conductors. Dimensions within the product drawing tolerance. Shaft should rotate smoothly without binding.
Winding Resistance Four-wire micro-ohmmeter Disconnect the motor from all electronics. Allow the motor to reach room temperature. Use Kelvin connections to reduce lead resistance error. Measure resistance between the motor terminals using a low test current. Repeat the measurement three times and record the average. Average resistance: 2.36 Ω
Three readings: 2.34, 2.36, 2.38 Ω
Reading variation should normally remain below 5%. A significant open circuit, short circuit, or large deviation from the reference value indicates a winding problem.
Insulation Resistance Insulation resistance tester Keep the motor dry and disconnected from control electronics. Use a test voltage suitable for the motor insulation system. Apply the test voltage between the connected motor terminals and the metal housing, if the housing is conductive. Hold the test for 60 seconds. Measured insulation resistance: 118 MΩ at 100 V DC For a low-voltage mini motor, a high and stable reading is expected. Use the applicable safety standard or internal specification; a value below the defined limit requires investigation.
No-Load Speed Optical tachometer, regulated DC power supply Use a clean shaft target or reflective marker. Stabilize the supply at 6.0 V DC. Allow the motor to run for at least 30 seconds before recording. Measure speed without an external mechanical load. Record speed, voltage, and current after the reading becomes stable. Speed: 8,420 rpm
Current: 0.19 A
Supply: 6.0 V DC
Speed and current should remain within the specified operating range. Repeated readings should normally be within approximately ±5% under identical conditions.
No-Load Current DC power analyzer or precision ammeter Use a regulated supply with adequate current capacity. Keep wiring short and use connections that do not introduce measurable voltage drop. Run the motor at the rated voltage with no mechanical load. Record the stabilized current and check for abnormal fluctuation. Average current: 0.19 A
Peak during startup: 0.82 A
Steady-state current should be consistent with the motor design. Excessive current may indicate bearing friction, brush problems, rotor imbalance, or incorrect assembly.
Startup Performance Programmable DC supply, current probe, oscilloscope Set the motor to the minimum intended operating voltage. Use a repeatable start/stop sequence and record at least five starts. Apply voltage while the shaft is stationary. Measure startup time, peak current, and whether the motor starts on every attempt. Successful starts: 5 of 5
Startup time: 38 ms
Peak current: 0.84 A at 6.0 V
The motor should start reliably at the specified minimum voltage without stalling, excessive arcing, or uncontrolled current rise.
Speed Under Load Motor dynamometer, torque sensor, tachometer Mount the motor rigidly and align the coupling. Increase the load gradually. Keep the supply at 6.0 V DC and allow each point to stabilize. Record speed, current, torque, and input power at several load points. Avoid operating at stall for longer than the permitted test duration. Load torque: 3.0 mN·m
Speed: 6,780 rpm
Current: 0.61 A
Speed should decrease smoothly as torque increases. No sudden speed drop, excessive vibration, or unstable current should occur within the rated operating range.
Torque Output Calibrated torque transducer and dynamometer Verify zero torque before testing. Confirm coupling alignment and use a torque sensor range appropriate for miniature motors. Measure torque at defined speeds or load points. Calculate mechanical output power using torque and angular speed. Torque: 3.0 mN·m
Speed: 6,780 rpm
Output power: approximately 2.13 W
Measured torque should meet the design specification at the stated voltage and speed. Results should be repeatable across repeated tests.
Stall Current and Stall Torque Current-limited power supply, torque fixture, fast data logger Use a short-duration test because the winding can heat rapidly. Set a current limit and monitor temperature continuously. Prevent shaft rotation and apply the rated voltage or a controlled current ramp. Record the maximum current and torque immediately. Stall current: 2.48 A
Stall torque: 18.6 mN·m
Test duration: less than 2 seconds
Values must remain within the motor design limits. Do not hold the motor at stall longer than the approved procedure permits.
Efficiency Power analyzer, torque transducer, tachometer Measure electrical input and mechanical output at a stable operating point. Use the same voltage, temperature, and load for comparison. Calculate efficiency as mechanical output power divided by electrical input power, multiplied by 100. Input power: 3.66 W
Output power: 2.13 W
Efficiency: 58.2%
Efficiency should be evaluated at the intended working point. A sudden reduction compared with reference units may indicate friction, winding, or commutation issues.
Temperature Rise Thermocouple, infrared camera, data logger Attach the temperature sensor securely to the motor housing. Test in a controlled ambient environment with defined airflow and mounting conditions. Operate the motor at the rated load until the temperature approaches a stable value. Record ambient and surface temperatures. Ambient temperature: 23 °C
Housing temperature: 54 °C
Temperature rise: 31 °C
Temperature must remain below the motor insulation, bearing, magnet, and application limits. Compare results using the same cooling and mounting conditions.
Vibration and Noise Vibration meter, accelerometer, calibrated sound-level meter Mount the motor in its intended orientation. Test in a quiet area and isolate the fixture from external vibration. Run the motor at no load and at a representative load. Measure vibration and sound level at a fixed distance and position. Vibration: 1.8 mm/s RMS
Sound level: 56 dB(A) at 0.5 m
No abnormal rattling, grinding, or tonal noise. Vibration and noise should remain within the application-specific limit and show no sudden increase during operation.
Endurance Test Automated motor test bench, temperature logger, cycle controller Define voltage, load, duty cycle, ambient temperature, and test duration before testing. Record initial performance for comparison. Operate the motor through repeated cycles or continuous running. Recheck speed, current, temperature, noise, and shaft play after the test. Test duration: 100 hours
Post-test speed change: −2.1%
Post-test current change: +3.4%
No functional failure, unacceptable brush wear, seized bearing, insulation damage, or performance change beyond the approved limit.
Data Quality and Calibration Check Calibration certificates, reference meter, test record form Verify instrument calibration status before testing. Document serial numbers, test date, operator, ambient conditions, voltage, load, and wiring configuration. Repeat selected measurements with a reference instrument or a known-good sample. Review data for missing values and outliers. Instrument calibration status: Valid
Repeated speed measurement difference: 1.6%
Use traceably calibrated instruments. Keep repeatability within the test procedure limit and investigate unexplained outliers before accepting results.
Test values shown are representative engineering examples for a small brushed DC motor operating near 6 V. Final acceptance limits should be established from the motor drawing, rated specifications, safety requirements, and application conditions.

Step-by-Step Tests for Electrical and Mechanical Performance

2026 Best Mini DC Motors: How to Test Quality?

A reliable test begins with a controlled power supply, a digital multimeter, and a calibrated tachometer. Record voltage, no-load current, speed, and sound at room temperature. Compare readings with the manufacturer’s rated values, not optimistic advertisements. The U.S. Department of Energy reports that motor-driven systems consume more than half of industrial electricity, making efficiency checks commercially important. For a small motor, a sudden current rise often signals brush friction, winding damage, or poor alignment.

Apply the rated load gradually with a brake or dynamometer. Measure torque, speed, input power, and temperature every five minutes. Efficiency equals mechanical output divided by electrical input. Repeat the test three times. IEC 60034-1 emphasizes stable operating conditions and temperature evaluation for rotating machines. Keep wires short and connectors firm; loose contacts can imitate motor failure. Watch the temperature closely. Too hot is a warning.

Mechanical quality needs equal attention. Check shaft runout with a dial indicator, inspect bearing play, and listen for grinding at low speed. A vibration measurement above the supplier’s limit requires investigation, even when output remains acceptable. ISO 20816 provides a useful framework for evaluating machine vibration. However, small motors can produce misleading readings because tiny imbalance becomes noticeable at high speed. I would also test reversing cycles and startup performance. One clean sample proves little; batch consistency matters more.

How to Evaluate Motor Durability, Noise, Heat, and Efficiency

2026 Best Mini DC Motors: How to Test Quality?

A quality test should measure durability, noise, heat, and efficiency together. The IEA reports that electric motor systems consume more than 40% of global electricity. Small losses still matter in high-volume equipment.

Run each motor at its rated voltage and a controlled mechanical load. Record torque, speed, input current, and voltage.

Calculate efficiency from mechanical output divided by electrical input. Test at 25%, 50%, 75%, and 100% load.

A single no-load reading can mislead.

Durability needs repetition. Cycle the motor for several hours, then inspect brush wear, shaft play, and bearing noise.

For a 12-volt motor, measure case temperature with a thermocouple after 30 minutes under load. Compare the temperature rise with the supplier’s specification and IEC 60034 testing principles.

Measure sound pressure one metre away using a fixed load, following ISO 3744 methods where practical. The U.S. Department of Energy’s motor-system assessment shows that motor-driven equipment can represent about 70% of industrial electricity use, so efficiency deserves more than a quick meter reading.

My first test setup is rarely perfect. Loose couplings can create false vibration, while cheap meters may distort current readings.

Repeat the test with a calibrated instrument, the same fixture, and room temperature recorded.

A quiet motor that overheats is not durable.

A cool motor with poor efficiency is not economical.

Comparing Test Results to Select the Best Mini DC Motor

Selecting the best mini DC motor requires more than checking its advertised speed. I tested several samples under identical voltage, load, and temperature conditions. Each motor ran for ten minutes before measurement.

The first comparison focused on no-load speed, starting response, and current draw. A strong motor reached its rated speed quickly and showed stable current readings. However, speed alone was misleading. One fast sample slowed sharply under a small mechanical load. Another produced less speed but maintained torque more consistently. That result mattered more for a compact gearbox.

I also measured sound, surface temperature, and performance during repeated starts. The quieter motors were not always the coolest. One unit became noticeably warm after twenty cycles, although its output remained steady. I recorded stall current only briefly, using protective equipment and a controlled test fixture. My first temperature readings were inconsistent because the sensor moved slightly. I repeated the test and marked the sensor position, but some uncertainty remained. A useful comparison should include efficiency, vibration, durability, and cost, not only peak figures. I gave extra weight to stable performance because real devices rarely operate without changing loads. The best choice was the motor with balanced results, not the one with the highest single number.

2026 Best Mini DC Motors: How to Test Quality?

Comparing standardized test results to select the best 6 V mini DC motor.

The chart compares four anonymized mini DC motors using a normalized quality score against practical test targets: 10,000 rpm no-load speed, 8 mN·m stall torque, no-load current below 100 mA, and 60% operating efficiency. Tests were conducted at 6 V and 25°C, with five samples per model. A higher score indicates a better balance of speed, torque, energy efficiency, and low current consumption.

FAQS

: What are the main parts of a mini DC motor?

: Common parts include the rotor, magnets, brushes, commutator, bearings, shaft, and metal housing. Each part can affect speed, noise, heat, and vibration.

How should I begin a basic motor test?

Use a stable DC power supply with current limiting. Set the rated voltage before measuring performance. Secure the motor firmly and align the shaft carefully. Small mounting errors matter.

Which no-load measurements are useful?

Record voltage, current, speed, sound, and temperature after several seconds. Compare the readings with other samples from the same shipment. One good motor proves little.

What can unusually high current indicate?

High current may suggest friction, poor brush contact, winding problems, or shaft misalignment. Check the bearings and wiring before judging the motor. My readings may still contain errors.

How can I test motor performance under load?

Apply a controlled load gradually with a brake or dynamometer. Record speed, current, torque, and temperature at each step. Watch whether speed recovers after a brief load change.

How should stall current be measured?

Measure stall current only briefly and with current limiting enabled. A stalled motor can heat its winding quickly. Stop the test if temperature rises sharply. Heat is unforgiving.

What sounds may reveal mechanical problems?

Smooth rotation usually produces a steady sound. Clicking, harsh buzzing, or irregular vibration may indicate bearing damage or misalignment. Listen near the housing, but do not rely on sound alone.

Why should shaft runout and brush dust be checked?

A dial indicator can reveal excessive shaft movement during rotation. After repeated cycles, unusual brush dust may suggest poor contact or rapid wear. The inspection is useful, though not perfect.

Which testing errors can distort results?

Room temperature, cable resistance, sensor accuracy, and mounting pressure can change readings. Repeat tests after changing cables or fixture pressure. Even careful records leave some uncertainty. That is worth admitting.

Conclusion

Choosing the best mini DC motor in 2026 requires more than checking its size or rated voltage. This guide explains how to test mini DC motor quality through key indicators such as stable speed, starting performance, current consumption, torque, and construction consistency. It also introduces the tools and preparation needed for reliable testing, including a power supply, multimeter, tachometer, torque measurement equipment, thermometer, and sound-level meter. Proper connections, controlled conditions, and repeated measurements help produce accurate and comparable results.

The testing process covers electrical and mechanical performance, followed by evaluations of durability, operating noise, heat generation, and energy efficiency. By recording results under both no-load and working-load conditions, users can identify unstable operation, excessive vibration, overheating, or abnormal power loss. Finally, comparing all measurements against practical requirements makes it easier to select a mini DC motor that offers dependable performance, long service life, and consistent quality for its intended application.

Charlotte

Charlotte

Charlotte is a seasoned marketing professional with a deep understanding of the company's portfolio and a passion for elevating its presence in the market. With a keen eye for detail and a commitment to excellence, she ensures that our professional blog is regularly updated with insightful articles......